CSS Selectors
Intro
CSS works by targeting specific elements based on a set of rules. Those rules are called ‘Selectors’. There are four main selector types:
- Element - Element selectors select elements by the tag name. The tag name itself is the selector.
- IDs - You can select element(s) by ID by prefixing the ID name with a hash (#). (Remember, you should only have one of any kind of ID on any HTML page, so this selector should only select one element. However, if you break the rules and have more than one of a kind of ID, the CSS will apply to all elements of that ID.)
- Class - You can select elements by Class name by prefixing the class name with a period (.). Remember you can put multiple classes on a single element, so you can use this to combine multiple style declarations together.
- Attribute - You can select elements by Attribute and Attribute value by using the following syntax:
[*attr*]{}and[*attr*=*value*]{}. Ex:[disabled]{}or[type="email"]{}
A few things to remember:
- Some selectors are more powerful than other, which can cause the selector to override another selector. That’s called ‘Specificity’. For example, if I have a selector with an ID, the styles it applies would override the styles applied to any elements matching a selector with only a class. However, there are rules surrounding how specificity works.
- You can be more specific with your selectors by chaining them together, like this:
div.form-group input[type="number"]{}. In other words, “Select an input with the type of ‘number’ which is inside of a div with a class ‘form-group’”. Without specificity like this, you wouldn’t be able to target specific elements without changing other elements too. This also increases the specificity of your selector. For example, a selector with two classes (.button.blue) would override the styles of a selector with only one selector(.button) - You can put commas between selectors to apply CSS to both selectors. Ex:
div, p{}applies style to both<div>and<p>tags. - There are more advanced selectors which can be added to other selectors to make them more powerful. Examples include
:before,:after,:nth-child(), and:first-of-type - Never ever use
!important
Suggested Learning
- Selector Reference - Review all of the selectors
- CSS Diner - Practice CSS Selectors
- Interactive CSS Selectors
- CSS Specificity - How CSS Selectors override each other
Requirements
- Make sure you have an account on Codepen
- Fork this Codepen: CSS Selectors Assignment.
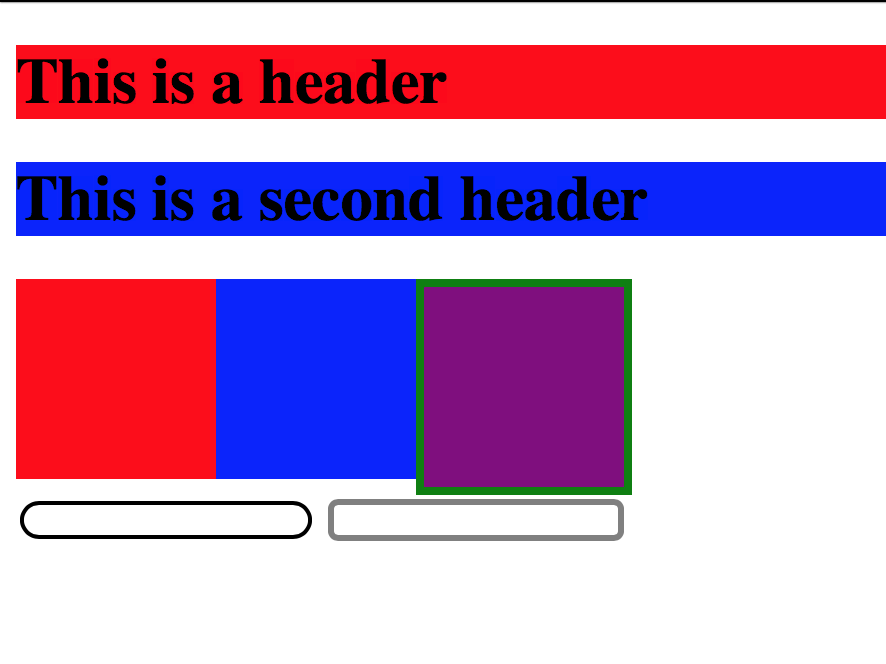
- Without changing the HTML or CSS Attributes, add Selectors to the CSS editor style rules to make the output HTML look like the following reference image:

- Send the link to your forked Codepen to the
#requirementsDiscord channel to show you have passed this requirement off.
Extra Learning
- Specificity Calculator
- CSS Selector Guidelines - Includes more helpful information.